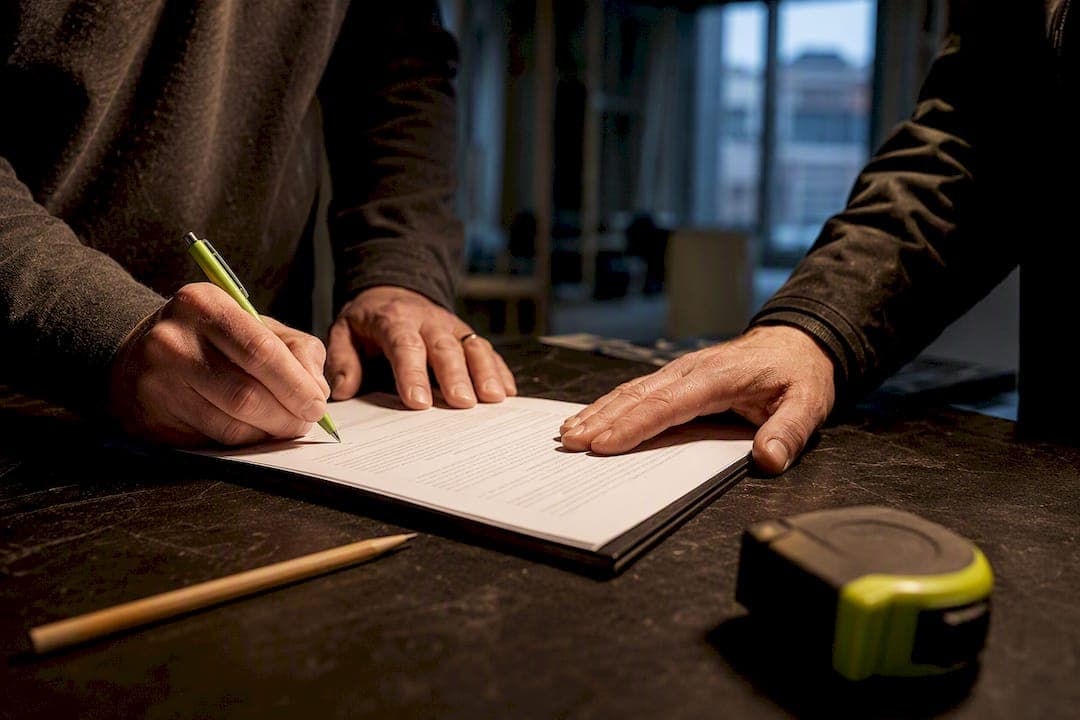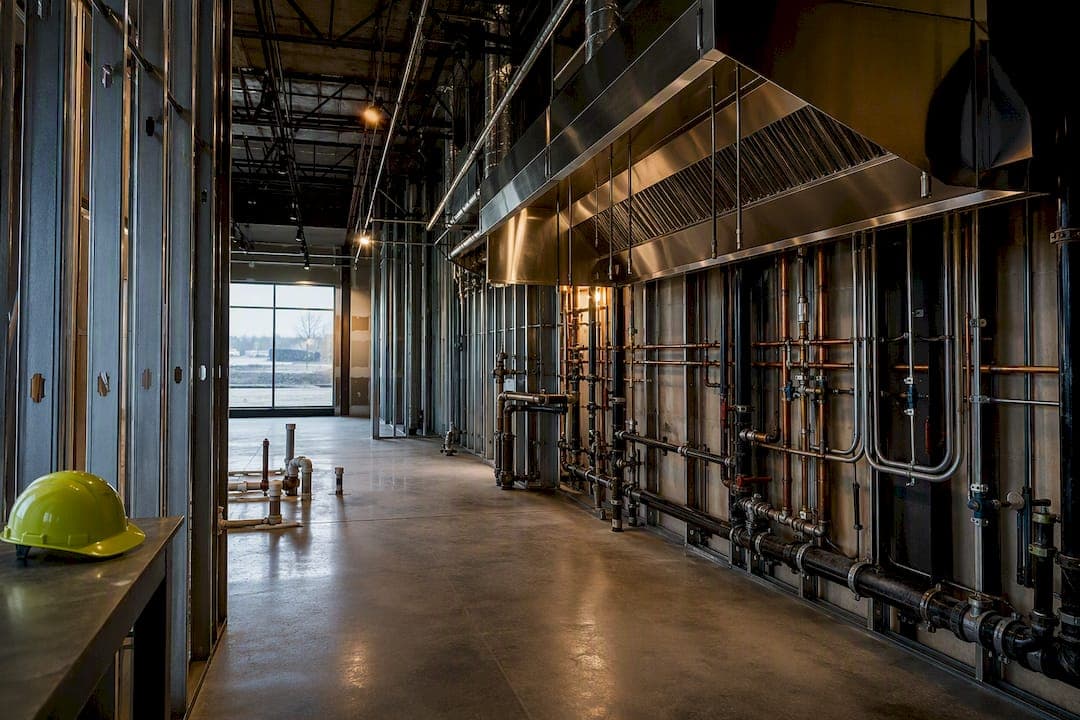
Most detached and semi-detached Canadian homes can support a second storey, but feasibility depends on three things: foundation capacity, local zoning rules, and whether your mechanical systems can be extended. Get those three checks right before you spend a dollar on design.
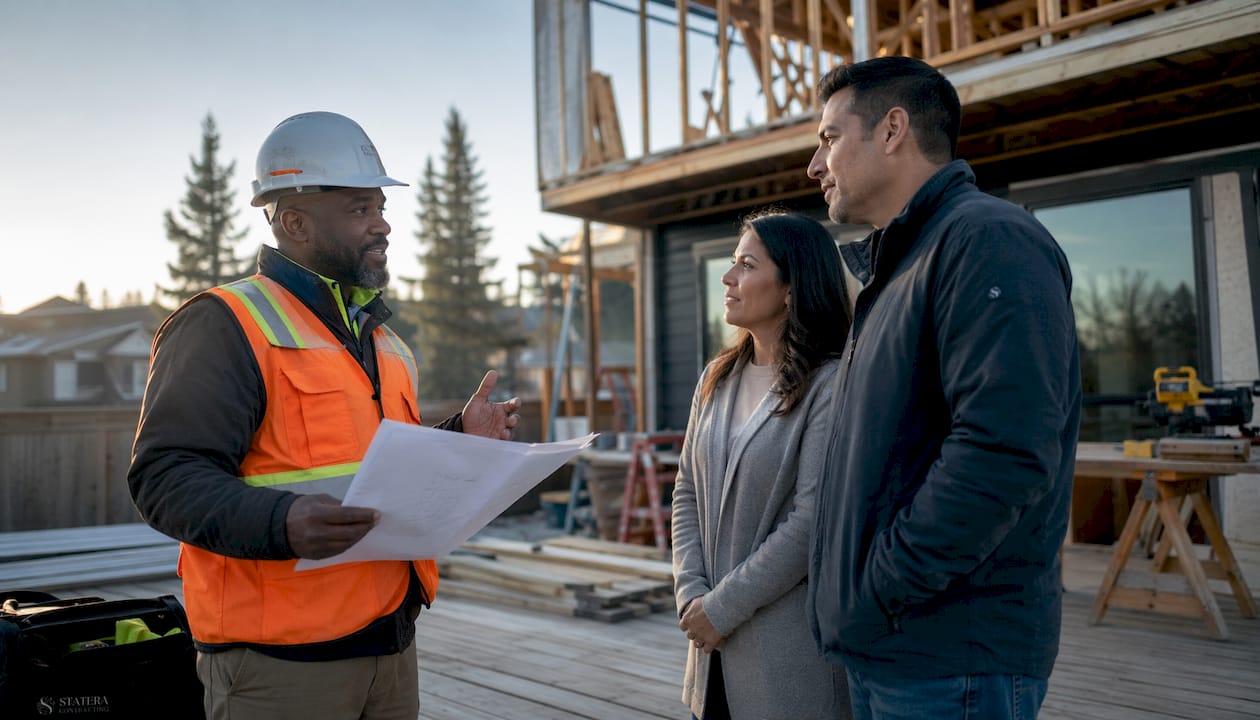
Cost-wise, second-storey additions across Canada typically run $150,000–$550,000 all-in, depending on scope and region. Alberta sits in a moderate range, roughly $180–$350 per square foot, while Ontario and the GTA commonly land at the top of the national band. Those figures include construction, soft costs, and permits, but not temporary accommodation or contingency.
Before any design work begins, you need three things confirmed:
- A licensed structural engineer’s assessment of your foundation and floor system
- A zoning check with your municipality on height limits, lot coverage, and setbacks
- A preliminary review against the National Building Code of Canada and your provincial equivalent (the Ontario Building Code in Ontario, the BC Step Code in British Columbia)
Statera Contracting handles all three of those steps as part of our feasibility process for Calgary-area homeowners, so you know what you’re working with before committing to a full design budget.
Table of Contents
- What does adding a second storey to a house actually involve?
- How much does a second-storey addition cost in Canada?
- What permits and zoning rules apply to a second storey in Canada?
- Does your foundation actually support a second storey?
- How long does a second-storey project take, and when do you need to move out?
- Design decisions that affect your budget and livability
- Second storey vs. ground-floor addition vs. moving: which makes sense for you?
- How to hire the right contractor for a second-storey project
- How Statera Contracting approaches second-storey additions
- Hidden costs and surprises homeowners often miss
- Key takeaways
- Statera Contracting can take your second-storey project from feasibility to final inspection
- Useful sources and further reading for Canadian homeowners
What does adding a second storey to a house actually involve?
A second-storey addition is not a straightforward extension. You are effectively rebuilding the top half of your home on top of an existing structure, which means every trade is involved and every system in the house gets touched. Here is how the project unfolds from start to finish.
-
Feasibility review. A licensed structural engineer inspects your existing footings, soil conditions, first-floor load paths, and ceiling/joist capacity. Simultaneously, your designer or contractor checks the zoning envelope: building height limits, lot coverage maximums, angular plane rules, and setbacks. This step determines whether a full or partial second storey is viable without major structural intervention.
-
Architectural and engineering design. Once feasibility is confirmed, an architect produces permit-ready drawings. A structural engineer prepares stamped calculations covering the new floor system, shear walls, beam sizing, and any foundation reinforcement. Your mechanical engineer or HVAC designer plans how heating, cooling, plumbing, and electrical will extend upward.
-
Permit application. You submit a full building permit package to your municipality. This includes architectural drawings, stamped structural calculations, a site plan, and mechanical/electrical layouts. In some cases, a minor variance application goes to a Committee of Adjustment if the design exceeds zoning limits.
-
Temporary shoring and roof removal. Once permits are in hand, the contractor installs temporary shoring to support the first-floor structure, then removes the existing roof. This is the most weather-sensitive and disruptive phase of the project.
-
Foundation reinforcement (if required). If the engineer’s assessment identified inadequate footings, underpinning or new concrete strip footings are completed before framing begins. This phase can add significant time and cost.
-
Floor framing, walls, and new roof. The new floor system is framed, exterior walls are built, and a new roof is constructed. Structural inspections happen at framing milestones.
-
Mechanical, electrical, and plumbing rough-in. HVAC ducts or heat pump lines, electrical wiring, and plumbing risers are extended to the second floor. Ceiling finishes on the main floor are typically opened to run these systems.
-
Insulation, air-sealing, and finishing. Insulation is installed to meet current code requirements, walls are drywalled, and finishing work begins. Municipal inspectors review insulation and systems rough-in before walls are closed.
-
Final inspections and occupancy. The municipality conducts a final inspection covering all trades. Once sign-off is received, the addition is legal and occupiable.
Pro Tip: Order the structural engineer’s report before you engage an architect for detailed design. If the foundation needs underpinning, that changes the scope and budget significantly. Discovering it after design is complete means paying for revisions.
How much does a second-storey addition cost in Canada?
Cost is the question most homeowners ask first, and the honest answer is that the range is wide because the variables are significant. Here is how to think about it.
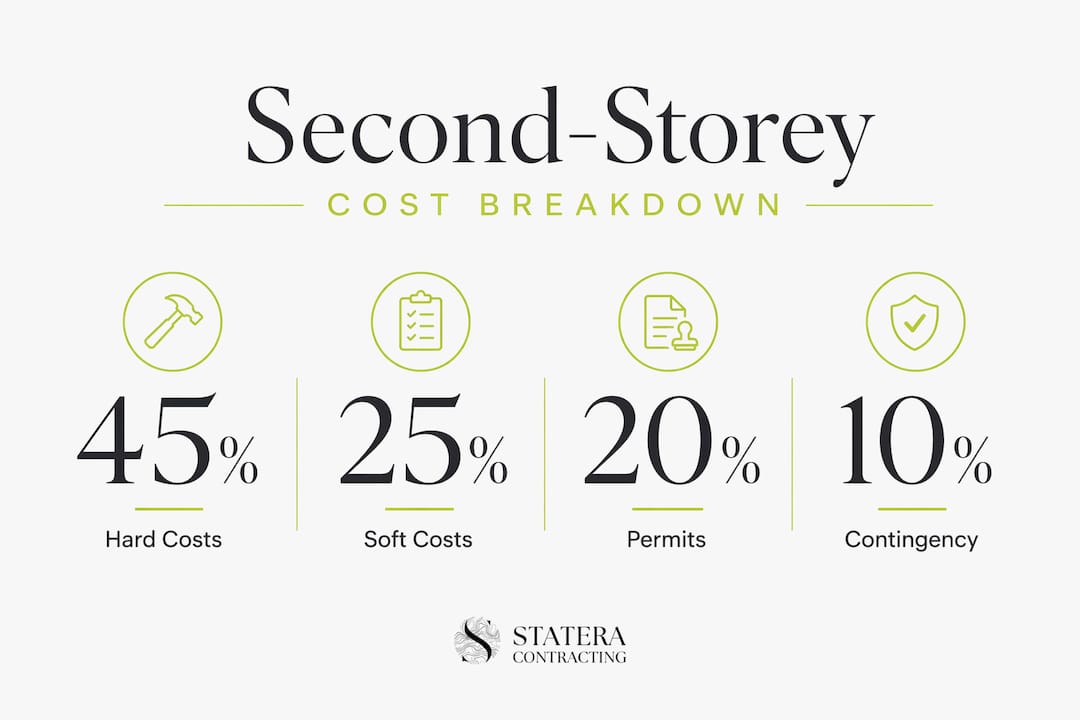
Hard costs vs. soft costs
Hard costs cover everything physical: framing, roofing, insulation, windows, exterior cladding, interior finishing, flooring, and all mechanical work. Soft costs cover everything professional: architectural fees, structural engineering, permit fees, development charges, planning consultant fees if a variance is needed, and any Committee of Adjustment costs. Soft costs typically add a notable percentage on top of the construction budget and should be budgeted as a separate line item, not folded into the per-square-foot construction estimate.
Regional cost ranges
Alberta sits in a moderate national range. Saskatchewan generally has moderate per-square-foot costs for second-storey work. Ontario tends to be higher, with costs commonly above the national average, and Toronto/GTA projects often exceed this due to labour, zoning complexity, and permit costs. British Columbia, particularly Vancouver, is among the highest cost regions.
What drives the cost up
- Foundation reinforcement or underpinning. This is the single largest unexpected cost on older bungalows. If footings are undersized, underpinning can add tens of thousands of dollars before framing even begins.
- MEP upgrades. Extending HVAC, upgrading the electrical panel, and running plumbing risers to the second floor involves opening main-floor ceilings and walls. Modern energy-efficiency standards like the BC Step Code and recent Ontario Building Code updates can require whole-home mechanical upgrades, not just extensions.
- Adding an ensuite. A basic second-floor bathroom can be a significant expense; higher-end finishes may substantially increase costs. Plumbing accounts for a large share of that cost because new supply and waste lines must be routed through the first-floor structure.
- Structural steel and long spans. Open-concept second floors or additions over garages often require custom steel beams, which add both material and crane costs.
- Finish level. Economy finishes versus premium finishes can shift the per-square-foot cost by $100 or more.
Sample budget scenarios (800–1,200 sq ft second storey, Alberta)
| Cost category | Economy finish | Midrange finish | Premium finish |
|---|---|---|---|
| MEP upgrades | $15,000 | $25,000 | $40,000 |
| Contingency (15–20%) | $26,000 | $40,000 | $53,000 |
Note: These are illustrative Alberta ranges. Your actual costs depend on your specific home, municipality, and scope. Get a fixed-price quote from a licensed contractor before committing.
Budget callout: Always carry a contingency of 15–20% on top of your construction estimate. Foundation surprises, hazardous material abatement, and permit delays are common enough that a 10% contingency is rarely sufficient on a second-storey project.
What permits and zoning rules apply to a second storey in Canada?
Building permits are legally required for second-storey additions in every Canadian municipality. Building without one risks stop-work orders, fines, and costly remediation or forced deconstruction. The permit process is not optional, and it is not something to work around.
What the permit package must include
Most municipal building departments require:
- Architectural drawings (floor plans, elevations, sections)
- Stamped structural calculations and drawings from a licensed professional engineer
- A site plan showing setbacks and lot coverage
- Mechanical, electrical, and plumbing layouts
- Energy compliance documentation where required by provincial code
The governing technical standards are the National Building Code of Canada and provincial equivalents. In Ontario, that is the Ontario Building Code. In British Columbia, the BC Step Code sets energy performance tiers that increasingly apply to addition projects. Alberta follows the National Building Code with provincial amendments.
Zoning checks you must make first
Zoning bylaws are frequently the primary blocker for second-storey additions, not construction capability. The key checks are:
- Building height limits. Many residential zones cap total building height at 8–10 metres. A second storey on a tall bungalow can push you close to or over that limit.
- Angular plane rules. Some municipalities require the building to step back from the property line as it rises, to limit shadowing on neighbours. This can force a partial second storey or a sloped roofline.
- Lot coverage. Adding a second storey does not increase lot coverage (footprint), but some municipalities count gross floor area, which does increase.
- Setbacks. If your existing home is already close to a setback limit, a second storey may trigger additional review.
When a minor variance is required
If your design exceeds any zoning standard, you need a minor variance from a Committee of Adjustment (or equivalent body in your province). This adds a planning consultant fee, a hearing fee, and typically several months to the timeline. Factor that into your schedule and budget before you fall in love with a design that pushes zoning limits.
Key risk: Unpermitted second-storey work is not just a fine risk. It creates a title issue that surfaces at sale, can void your home insurance, and may require partial demolition to resolve. The permit process protects you as much as it regulates you.
Timeline note: Permit review for a zoning-compliant second-storey addition typically takes 6–12 weeks in most Canadian municipalities. Projects requiring a Committee of Adjustment hearing can extend the pre-construction phase by several additional months.
Does your foundation actually support a second storey?
This is the question that determines whether your project is straightforward or expensive, and you cannot answer it without a licensed structural engineer. No contractor, no architect, and no online calculator can substitute for an engineer’s on-site assessment.
What the engineer checks
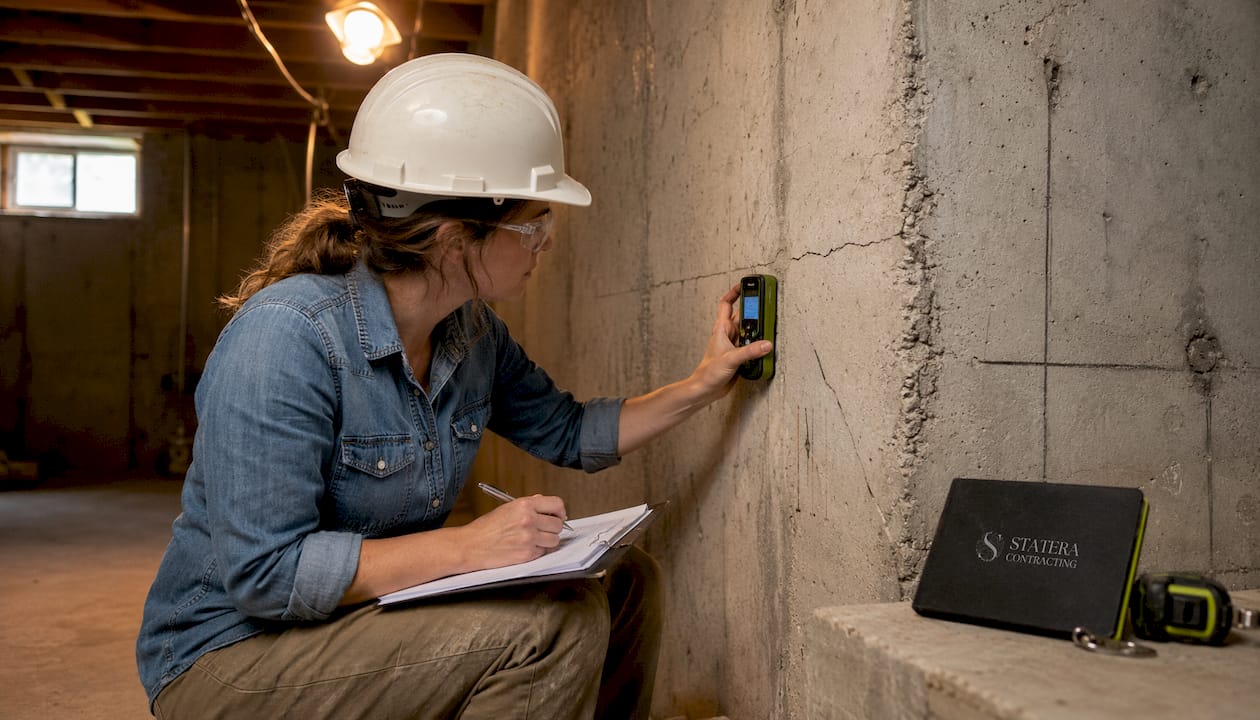
- Footing size and condition. Older homes, particularly bungalows built before the 1970s, often have footings sized only for a single storey. Adding a second storey roughly doubles the load on those footings.
- Soil bearing capacity. In some Alberta communities, expansive clay soils or poor bearing conditions mean the soil itself cannot support additional load without remediation.
- First-floor load paths. The engineer traces how loads travel from the new roof down through walls, beams, and columns to the foundation. Gaps in that load path need to be corrected.
- Ceiling and joist adequacy. Existing ceiling joists are often sized as ceiling members, not floor members. They typically need to be upgraded or sistered to carry the live and dead loads of a second floor.
Common reinforcement solutions
- Underpinning. Extending existing footings deeper or wider to increase bearing area. This is the most common structural remedy for older bungalows and can be the single largest unexpected cost on a project.
- New concrete strip footings. Where underpinning is not practical, new footings are poured alongside or beneath existing ones.
- Steel beams. Long spans or open-concept designs often require steel beams to transfer loads to columns and footings.
- Sistered joists and engineered shear walls. Existing joists are reinforced by sistering new members alongside them. Shear walls resist lateral loads from wind and seismic forces.
Partial additions over a garage or wing
Adding a second storey only over a garage or a single wing of the house creates concentrated point loads at the transition between the addition and the existing structure. These situations almost always require custom steel work and careful engineering at the connection detail. Do not assume a partial addition is simpler or cheaper than a full second storey until the engineer has reviewed it.
What to request from your engineer: a written scope of investigation, confirmation of whether a soil report is needed, stamped drawings and calculations for the permit package, and a schedule for site reviews during construction.
How long does a second-storey project take, and when do you need to move out?
A realistic end-to-end timeline for a second-storey addition in Canada runs 5–14 months from first design meeting to move-in, depending on permit complexity and whether a variance is needed. Zoning-compliant projects typically run 5–9 months; projects requiring a Committee of Adjustment hearing can stretch to 8–14 months or longer.
Project milestone timeline
| Phase | Typical duration |
|---|---|
| Feasibility, structural assessment, zoning check | 2–4 weeks |
| Architectural and engineering design | 6–10 weeks |
| Permit application and review | 6–12 weeks (add 3–5 months for variance) |
| Demolition and roof removal | 1–2 weeks |
| Foundation reinforcement (if required) | 2–6 weeks |
| Framing, new roof structure | 3–6 weeks |
| MEP rough-in (HVAC, electrical, plumbing) | 3–5 weeks |
| Insulation, drywall, finishing | 6–10 weeks |
| Final inspections and occupancy | 1–2 weeks |
When you need to vacate
Industry guidance is clear: the roof removal and structural tie-in phases are the most intrusive, and most homeowners need to temporarily vacate during these weeks. Once the roof is off, the home is exposed to weather, dust, and noise at a level that makes living there impractical and potentially unsafe. MEP rework, which involves opening main-floor ceilings, is the second most disruptive phase.
Practical options for temporary accommodation include short-term rentals, staying with family, or phasing the work so bedrooms are relocated to a finished basement or main-floor room while upper-floor work proceeds. Budget for temporary accommodation costs according to your family size and local rental rates, and include this as a line item in your project budget.
- Schedule roof removal and framing in late spring or summer to reduce weather risk and delays.
- Confirm with your contractor exactly which phases require vacating and for how long, in writing, before signing the contract.
- Keep a packed “essentials kit” ready so you can move out quickly if the schedule shifts.
Design decisions that affect your budget and livability
Getting the design right early saves money later. Several decisions made at the drawing stage have outsized effects on cost, timeline, and how well the finished home actually functions.
Stair placement
Stairs are a high-impact decision that most homeowners underestimate. A code-compliant staircase consumes roughly 80–120 square feet of main-floor footprint, and its placement determines traffic flow through the entire house. Locating stairs in the wrong spot can cut a living room in half or block natural light from a main-floor window. Design the staircase location early, before the rest of the floor plan is locked in, to avoid expensive revisions.
Mechanical and electrical upgrades
Extending HVAC to a second floor is rarely as simple as adding a duct run. Most existing furnaces are sized for a single storey and lack the capacity to heat or cool additional square footage effectively. Heat pumps are increasingly the preferred solution for second-storey additions because they can be zoned independently and meet current energy code requirements. Electrical panel upgrades are common too: older 100-amp panels rarely have capacity for the additional circuits a second floor requires. Budget for these upgrades as certainties, not contingencies.
Envelope and energy performance
Provincial energy rules are tightening. The BC Step Code sets tiered performance requirements that increasingly apply to addition projects, and Ontario’s Building Code has been updated to require improved thermal performance on new construction and major additions. In Alberta, the National Building Code amendments set minimum insulation and air-sealing standards. When you open exterior walls and the roof for a second-storey addition, you will likely be required to upgrade insulation and air-sealing to current standards across the affected areas. In some cases, this triggers a whole-home energy review.
Pro Tip: Check whether your municipality requires an energy compliance report as part of the permit package. Some Alberta municipalities now require this for major additions. Knowing early lets your designer incorporate it into the drawings rather than retrofitting it after permit submission.
For guidance on attic insulation and air-sealing as part of your envelope upgrade, the transition between the new second floor and the existing structure is a common air-leakage point that needs careful detailing.
Common design tradeoffs
- Roofline integration. Matching the new roofline to the existing home’s profile affects both aesthetics and drainage. A mismatched roofline can create water management problems at the junction.
- Window placement. Second-floor windows affect natural light, privacy, and exterior appearance. Placement also affects structural framing costs if windows fall in load-bearing wall locations.
- Exterior cladding. Matching new cladding to existing materials is harder than it sounds, particularly on older homes where original materials may be discontinued. Budget for a full re-clad if a close match is not available.
- Bathroom placement. Locating second-floor bathrooms directly above first-floor wet areas (kitchen, existing bathroom) minimises plumbing riser costs significantly.
Second storey vs. ground-floor addition vs. moving: which makes sense for you?
Not every homeowner should build up. The right answer depends on your lot, your budget, your timeline, and what you actually need from the additional space.
| Dimension | Second storey (build up) | Ground-floor addition (build out) | Moving |
|---|---|---|---|
| Typical cost | $150,000–$550,000+ | — | Transaction costs + price gap |
| Timeline/disruption | 5–14 months; vacate during roof/structural phases | 4–10 months; less intrusive to existing living areas | 1–3 months (transaction) |
| Structural complexity | High; foundation and load path review required | Moderate; new foundation for addition only | None |
| Permit/zoning difficulty | Moderate to high; height limits, angular plane rules | Moderate; lot coverage and setback checks | None |
| Square footage gained | 800–1,200 sq ft (full second storey) | — | Depends on target home |
| Mechanical/energy upgrades | Significant; full MEP extension required | Moderate; partial extension | None |
When building up makes the most sense
A second-storey addition is the right call when your lot is small or fully built out, you want to preserve your yard, and the neighbourhood supports the investment. Urban Calgary infill lots are a good example: lot coverage is often already at or near the maximum, making a ground-floor addition impossible without a variance. Building up captures significant square footage without touching the yard.
When building out is the better choice
If your lot has room and your foundation is already undersized, a ground-floor addition avoids the foundation reinforcement cost entirely. Building out is also less invasive to the existing living areas during construction, since the roof stays intact and the main floor is less disrupted.
When moving is the smarter financial decision
If your foundation requires extensive underpinning, your lot has heritage restrictions, or you need the additional space within six months, moving may be the more practical path. The renovation vs. moving decision comes down to whether the all-in cost of the addition, including soft costs and contingency, is less than the price gap between your current home and a larger one in the same neighbourhood.
Decision checklist:
- Does your lot allow a second storey under current zoning? (Check height limits and angular plane rules first.)
- Does your foundation require underpinning? (Get the engineer’s report before deciding.)
- Is the all-in addition cost less than the cost of moving to a larger home nearby?
- Can your family manage 5–14 months of disruption and temporary accommodation?
- Does the neighbourhood support the resale value of a two-storey home?
How to hire the right contractor for a second-storey project
A second-storey addition is one of the most complex residential projects a contractor can take on. Hiring the wrong one is the fastest way to blow your budget, miss your timeline, and end up with unpermitted work.
Pre-hire checklist
- Verify the contractor holds a valid Alberta business licence and general liability insurance (minimum $2 million).
- Confirm Workers’ Compensation Board (WCB) coverage for all workers on site.
- Request a portfolio of completed second-storey additions, with references you can actually call.
- Confirm the contractor has direct experience coordinating with municipal building departments and pulling permits in your municipality.
- Ask whether they work with in-house or preferred structural engineers, and how engineering coordination is managed.
Key questions to ask before signing
- Who pulls the building permit, and whose name goes on it?
- How do you coordinate with the structural engineer during construction?
- What is your change-order process, and how are unforeseen costs handled?
- Is the contract fixed-price or cost-plus? What is included in the fixed price?
- What milestone inspections are scheduled, and who is responsible for booking them?
- What is your warranty on workmanship, and how long does it run?
Contract clauses to insist on
- A detailed scope-of-work schedule listing every deliverable
- Milestone payments tied to completed and inspected phases, not calendar dates
- Clear permit responsibility: who applies, who pays fees, who manages re-submissions
- A written change-order process with cost approval required before work proceeds
- Contingency handling: how unforeseen costs (foundation surprises, hazardous materials) are communicated and approved
- A deficiency list process at substantial completion before final payment is released
Red flags to watch for
- Vague scope of work with no line-item breakdown
- Unwillingness to provide stamped structural drawings or engineer references
- No WCB or liability insurance documentation
- Requesting more than 10–15% upfront before any work begins
- No clear inspection plan or milestone schedule
- Pressure to start before permits are issued
For a broader look at planning a home addition in Calgary, including permit timelines and what to expect from the municipal process, Statera Contracting’s Calgary addition guide covers the local specifics in detail.
How Statera Contracting approaches second-storey additions
Statera Contracting manages second-storey additions in Calgary and surrounding areas as a complete design-to-delivery process. Here is how we structure it.
Our process, phase by phase
- Feasibility and structural scan. We start with a site visit and coordinate a licensed structural engineer’s assessment of your foundation, load paths, and first-floor framing. We also run a zoning check against your municipality’s bylaws before any design fees are committed.
- Design and permit preparation. We work with our architectural and engineering partners to produce a full permit package: architectural drawings, stamped structural calculations, site plan, and mechanical layouts. We manage the permit submission and respond to any municipal comments.
- Staged construction with inspections. Construction proceeds in phases tied to municipal inspection milestones: foundation/shoring, framing, MEP rough-in, insulation, and final. We book and manage all inspections so nothing is missed.
- Handover and warranty. At substantial completion, we walk through a deficiency list with you before releasing final payment. Our workmanship warranty covers the completed addition.
What we bring to the project
- Fixed-price line items on scope-defined work, so you know what you are committing to before construction starts
- Licensed trades across all disciplines (framing, roofing, HVAC, electrical, plumbing)
- WCB coverage for all workers on site
- Permit handling from application through final sign-off
- Engineering coordination to reduce delays caused by drawing revisions or municipal comments
Sample milestone schedule
| Milestone | Typical timing from project start |
|---|---|
| Feasibility and structural assessment complete | Week 2–4 |
| Design sign-off and permit submission | Week 8–12 |
| Permit issued | Week 14 (varies by municipality) |
| Roof removal and shoring | Week 1–2 of construction |
| Framing inspection passed | Week 4–6 of construction |
| MEP rough-in inspection passed | Week 8–10 of construction |
| Insulation and drywall | Week 10–14 of construction |
| Final inspection and occupancy | Week 16 of construction |
If you are weighing a second storey against other home addition options in Calgary, we can walk through feasibility for both approaches during an initial consultation.
Hidden costs and surprises homeowners often miss
Even well-planned second-storey projects encounter surprises. The ones below are common enough that you should budget for them before construction starts, not after.
The most common budget surprises
- Asbestos and hazardous material abatement. Homes built before 1990 often contain asbestos in popcorn ceilings, floor tiles, pipe insulation, or roofing materials. Abatement is mandatory before demolition and can add $5,000–$20,000 or more depending on the extent.
- Knob-and-tube wiring. Many older Calgary homes still have knob-and-tube wiring. Most insurers will not cover a home with active knob-and-tube, and adding a second storey typically requires a full electrical upgrade.
- Unexpected foundation defects. Cracks, settlement, or deteriorated footings discovered during construction require immediate remediation. This is why a pre-design engineer’s assessment is so important, but even thorough assessments can miss conditions that only become visible once excavation begins.
- Insurance premium adjustments. Adding a second storey increases your home’s replacement value, which increases your insurance premium. Notify your insurer before construction begins, not after, to avoid a coverage gap during the project. Premiums typically rise once the addition is complete and the home is re-appraised.
- Scaffolding and temporary weatherproofing. Once the roof is removed, the home needs temporary weatherproofing (tarps, temporary roofing) to protect the structure during framing. Scaffolding for exterior work adds cost too. Budget $5,000–$15,000 for these temporary works.
- Development charges and Committee of Adjustment fees. Some municipalities charge development fees for additions that increase gross floor area. A Committee of Adjustment hearing, if required, adds consultant fees and a hearing fee on top of the standard permit cost.
- Inspection re-tests. If a trade fails a municipal inspection, the re-test adds time and sometimes cost. Build a buffer into your timeline for this.
Pre-start checklist
Before your contractor breaks ground, confirm the following:
- Structural engineer’s assessment is complete and stamped drawings are in hand
- Zoning check is done and any required variance is approved
- Heritage designation check: some Calgary homes in established neighbourhoods have heritage overlays that restrict exterior changes
- Asbestos and hazardous material survey completed on homes built before 1990 (see renovating an older home in Alberta for what to watch for)
- Drainage and grading plan reviewed: adding a second storey changes roof drainage volumes
- Temporary accommodation booked for the roof removal and structural phases
- Home insurance provider notified of the project scope and start date
- Financing confirmed and available before construction begins
Contingency guidance: For a second-storey project with no known foundation issues and a home built after 1990, carry a 15–20% contingency. For a home built before 1980, or one where the engineer has flagged potential foundation concerns, carry 20% or more. The contingency is not a slush fund; it is a risk buffer for the surprises that are statistically likely on this type of project.
Key takeaways
Adding a second storey to a house is feasible for most Canadian detached homes, but the project requires a structural engineer’s assessment, a zoning check, and a realistic budget that includes soft costs, mechanical upgrades, and a 15–20% contingency before any design work begins.
| Point | Details |
|---|---|
| Start with engineering and zoning | Get a licensed structural engineer’s report and a municipal zoning check before spending on architectural design. |
| Budget for soft costs separately | Soft costs (architect, engineer, permits) typically add 10–20% on top of construction costs and must be budgeted as a separate line item. |
| Carry a 15–20% contingency | Foundation surprises, hazardous materials, and permit delays are common enough that a 10% contingency is rarely sufficient. |
| Expect 5–14 months end-to-end | Zoning-compliant projects run 5–9 months; projects needing a Committee of Adjustment hearing can reach 8–14 months or more. |
| Statera Contracting manages the full process | Statera handles feasibility, engineering coordination, permit submission, and fixed-price construction for Calgary-area homeowners. |
What actually makes second-storey projects succeed
Most second-storey projects that go sideways do not fail because of bad construction. They fail because the homeowner skipped the structural assessment, fell in love with a design before checking zoning, or hired a contractor who underpriced the job to win the work.
The pattern we see repeatedly at Statera Contracting is this: a homeowner gets three quotes, picks the lowest one, and then discovers mid-project that the foundation needs underpinning, the electrical panel needs replacing, and the permit package was never properly submitted. By that point, the “savings” from the low quote are gone, and the project is months behind schedule.
The pragmatic steps that actually protect you are unglamorous: get the engineer’s report first, confirm zoning before designing, and insist on a fixed-price contract with milestone payments tied to inspections. A contractor who resists any of those three things is telling you something important.
Balancing cost, disruption, and long-term value on a second-storey project means being honest about what your home needs structurally before you commit to what you want aesthetically. The homes that turn out well are the ones where the homeowner understood the full scope going in, not the ones where the budget was set before the foundation was assessed.
Statera Contracting can take your second-storey project from feasibility to final inspection
A second-storey addition is one of the most significant investments you can make in your home, and the difference between a smooth project and a costly one usually comes down to who is managing the process. Statera Contracting delivers second-storey additions in Calgary and surrounding areas with a fixed-price approach that covers feasibility assessment, engineering coordination, permit handling, and full construction management.

We coordinate the structural engineer, manage the permit submission, and keep the project on a milestone schedule tied to municipal inspections. You get a single point of contact from the first site visit through to final sign-off, with no surprises on scope or cost outside of a documented change-order process. Whether you are adding a full second storey, a partial addition over a garage, or weighing a home addition against other options, we can walk through the feasibility numbers with you before you commit to anything.
Ready to find out what your home can support and what it will cost? Request a project estimate from Statera Contracting and we will start with a site visit and a straight answer on feasibility.
Useful sources and further reading for Canadian homeowners
These resources are worth bookmarking as you move through the planning process. Always check your specific municipality’s building department website for local permit requirements, as timelines and fees vary.
- National Building Code of Canada — the governing technical standard for construction across Canada, with provincial amendments applying in each province.
- City of Toronto — When do I need a building permit? — useful reference for understanding permit triggers, even if you are outside Toronto; most Canadian municipalities follow similar rules.
- Ontario.ca — Add a second unit in your house — Ontario government guidance on Building Code requirements for second units; relevant for understanding fire separation, egress, and inspection requirements.
- WealthNorth — Cost of a home addition in Canada — national cost overview with regional breakdowns.
- Canada Construction Network — Home addition costs across Canada — covers mechanical upgrade requirements and regional cost drivers.
- Sepco Consulting Engineers — Second storey addition structural design — explains what a full structural engineering package for a second-storey permit submission includes.
- Parsways — Structural design for second storey additions (Ontario) — practitioner guidance on foundation checks and underpinning requirements.
- Statera Contracting — Home additions Calgary — Statera’s service page for home additions in Calgary and surrounding areas; starting point for requesting a feasibility consultation.
- Statera Contracting — Home renovation tax credits in Canada — covers financing and tax credit options relevant to major home renovations, including additions.
- Statera Contracting — Smart renovations for Calgary homes — energy-efficiency standards and renovation planning relevant to mechanical upgrades on second-storey projects.
Check your local municipality’s building department website early in the planning process. Calgary, Edmonton, and most Alberta municipalities publish permit application guides, fee schedules, and zoning bylaw maps online. Starting there before your first contractor meeting will save you time and help you ask better questions.
Recommended
- Putting an addition on a house: Calgary homeowner’s guide | Statera Contracting
- Basement Finishing Calgary: Full 2026 Guide | Statera | Statera Contracting
- Home Renovations Calgary 2026 Owner’s Roadmap | Statera | Statera Contracting
- Average kitchen size in Canadian homes: 2026 guide | Statera Contracting