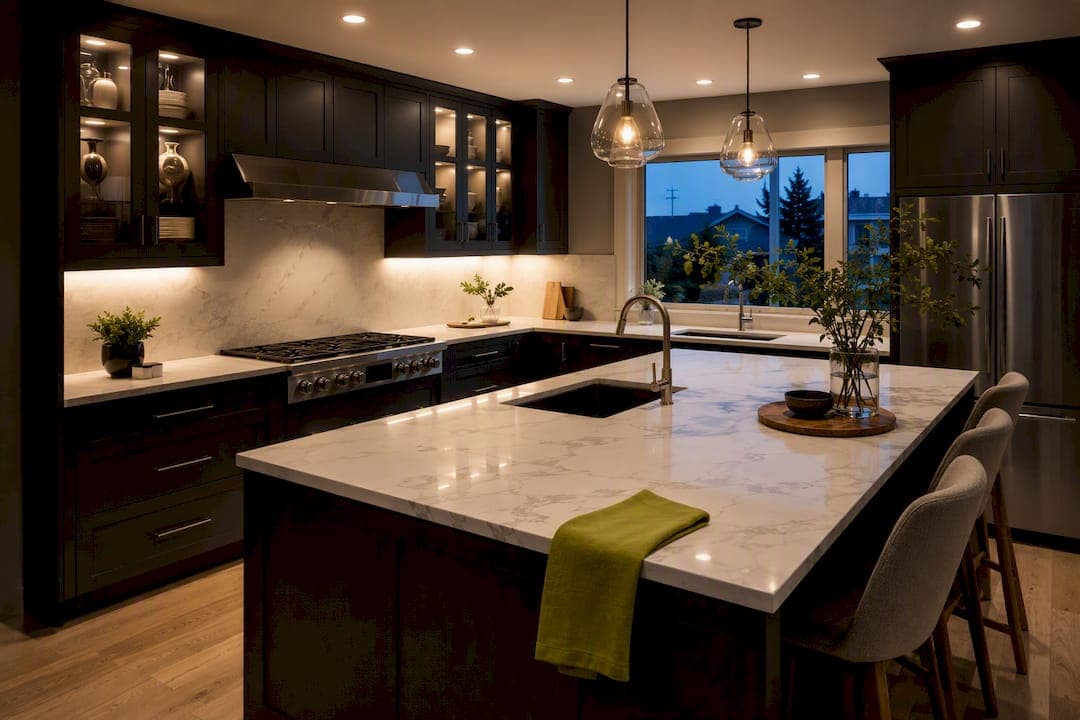
Use a three layer lighting plan, ambient, task, and accent, and size the whole system to about 70 to 100 lumens per square foot. Start by mapping your work zones (sink, stove, island, counters), then pick one colour temperature between 2700K and 3000K with a CRI of 90 or higher, and split every layer onto its own dimmer. The rest of this guide walks through the math, the placement rules, and the checklist a contractor will actually use on site.
TL;DR:
- Ensure the kitchen lighting plan includes separate dimmer controls for ambient, task, and accent layers to maximize flexibility and functionality.
- Plan fixture placement carefully, spacing recessed downlights 4 to 6 feet apart, and position island pendants and under-cabinet strips accurately to avoid shadows and hotspots.
- Use LED fixtures with a CRI of 90 or higher and a color temperature between 2700K and 3000K to maintain color harmony and energy efficiency.
- Verify sufficient circuits and proper driver placement with a licensed electrician before installation to meet safety standards and avoid future issues.
- Prioritize task lighting over aesthetic features, and align fixture specifications and controls early in the planning process for a cohesive, cost-effective kitchen remodel.
Statera Contracting — Plan Your Kitchen Renovation With Confidence. Statera Contracting renovates kitchens in Calgary and surrounding areas, along with bathrooms, basements, additions, exteriors, and commercial spaces. Explore renovation services
Table of Contents
- What is a kitchen lighting plan, and how many lumens do you need?
- How should you place and space kitchen light fixtures?
- What colour temperature and controls does a kitchen lighting plan need?
- What kitchen lighting mistakes should you check for?
- How much should you budget for kitchen lighting?
- How does a contractor turn a lighting plan into a finished kitchen?
- How do you balance natural light with your artificial lighting plan?
- Which fixture types actually work well in a kitchen?
- What makes a kitchen lighting plan energy efficient?
- What safety factors matter for kitchen light fixtures?
- The tradeoffs nobody puts in the brochure
- Ready to install your kitchen lighting plan?
- Sources
What is a kitchen lighting plan, and how many lumens do you need?
A kitchen lighting plan is a layout that assigns light output, fixture type, and control to three distinct jobs: general room brightness, focused work light, and visual highlights. Most kitchens fail not because the fixtures are ugly, but because only one of these three layers ever got designed. You end up with a ceiling full of downlights and a countertop covered in your own shadow.
Ambient lighting fills the whole room evenly, usually from recessed downlights, flush mounts, or a central fixture. Task lighting targets the surfaces you actually work on, mainly under-cabinet strips and pendants over the island. Accent lighting is the layer that does nothing functional at all, toe-kick strips, glass-cabinet lighting, a statement pendant, and exists purely to add depth once the sun goes down. One design resource compares this to a stereo system: ambient is the bass, task is the mid-range, and accent is the treble. Skip the treble and the room still works. Skip the bass or mid-range and something feels wrong even if you can’t say why.
The lumen target ties all three layers together. A well-planned kitchen should land between 70 and 100 lumens per square foot, measured across the whole room, not per fixture. Here’s the math for a kitchen that’s a common size in newer builds:
- Measure the room: a mid-size kitchen is typical in many homes, with an approximate moderate size. (check your own average kitchen size for comparison).
- Multiply by your target to estimate total lumens needed.
- Split that across layers: ideally divided into ambient, task, and accent portions to balance brightness and function.
Once you know each layer’s lumen budget, you can shop by fixture output instead of guessing at wattage.
If your ambient budget is 6,375 lumens and you’re using 700 lumen downlights, you need roughly nine of them, spaced to cover the room evenly rather than clustered near the sink. That’s a very different starting point than picking a fixture because it looked nice in a showroom.
How should you place and space kitchen light fixtures?
Placement matters more than fixture choice. A ceiling full of the right lights in the wrong spots still leaves you chopping onions in your own shadow.
Recessed downlights should be spaced on a grid, but the real rule that separates a good layout from a mediocre one is where that grid sits relative to your cabinets. Designers centre recessed fixtures in the walking aisle and align them with cabinet ends, rather than centring them over the cabinet face, which throws your shadow across the counter as you work. Placing lights slightly forward of the counter edge, centred in the aisle keeps the light falling on the countertop instead of on the back of your head. As a general spacing rule, keep recessed fixtures 4 to 6 feet apart on centre, tightening that spacing in smaller kitchens so you don’t end up with dark corners between cans.
Island pendants follow their own logic. For an island longer than 6 feet, plan two or three pendants; under that, two is usually enough. Space them evenly along the island’s length and hang them so the bottom of the fixture sits 30 to 36 inches above the counter surface, low enough to feel intentional, high enough that a six-foot guest doesn’t clip it with their forehead.
Under-cabinet lighting is where a lot of kitchens leave money on the table. A continuous LED strip mounted toward the front rail of the cabinet, behind a diffuser channel, throws even light across the counter without leaving visible dots of individual LEDs. Locating the strip near the front edge rather than the back also keeps the beam off the wall and onto the surface you’re actually cutting on. Pucks work in a pinch, but they create hot spots and dark gaps that a continuous strip avoids entirely. Drivers for these strips need to live somewhere accessible, not sealed inside a soffit, because a driver failure five years from now shouldn’t mean tearing open your ceiling.
Range and sink zones each benefit from a dedicated fixture in addition to ambient lighting to ensure sufficient illumination. A single downlight or a small pendant over the sink, and either a hood light or a nearby recessed can over the range, closes the gap that ambient lighting alone leaves behind.
- Recessed spacing: 4 to 6 feet on centre, tighter in small kitchens
- Island pendants: two for islands under 6 feet, two or three beyond that
- Pendant height: 30 to 36 inches above the counter
- Under-cabinet strips: mounted at the front rail, behind a diffuser
- Sink and range: each gets a dedicated fixture, not ambient spillover
Pro Tip: Plan your switch and dimmer zones before your electrician runs a single wire. Ambient, task, and accent should each land on a separate switch or dimmer, ideally on separate circuits, so you can dim the ceiling lights for a dinner party while keeping full task light over the stove.
What colour temperature and controls does a kitchen lighting plan need?
Choosing a single colour temperature for the kitchen and applying it consistently across all fixtures helps maintain visual harmony. A room lit by 2700K pendants and 4000K recessed cans looks visibly off, even to someone who couldn’t tell you why, because the human eye is remarkably good at spotting mismatched white light in the same field of view. Designers generally standardise on a single colour temperature per kitchen rather than mixing warm and cool fixtures, and reserve adjustable CCT fixtures for households whose taste is genuinely still evolving.
For most homes, 2700K to 3000K is the recommended range: 3000K reads a little brighter and more neutral, 2700K feels warmer and closer to old incandescent bulbs. Anything past 3500K starts to feel clinical in a residential kitchen, more like a hospital hallway than a place you’d want to cook dinner.
CRI, or colour rendering index, matters just as much as temperature and gets ignored far more often. A bulb with low CRI can technically be the “right” colour temperature and still make your tomatoes look grey and your countertop look dull. Specify CRI 90 or higher for every kitchen fixture, so food, skin tones, and cabinet finishes read the way they’re actually meant to.
Controls tie the whole system together:
- Put ambient, task, and accent on separate dimmers, never a single switch for the whole room
- Confirm your LED strips and drivers are dimmer-compatible before you buy, since not every driver plays nicely with every dimmer
- A basic scene setup (bright for cooking, dimmed ambient plus accent for dinner) needs nothing more than standard dimmers wired to separate zones, though a smart switch system makes recalling those scenes a one-tap job
What kitchen lighting mistakes should you check for?
Most kitchen lighting problems trace back to five repeat offenders, and every one of them is fixable without tearing out drywall.
- Downlights centred over cabinet faces instead of the aisle. This throws your shadow onto the counter every time you lean in to work. Fix: reposition new fixtures toward the aisle centre, or add a task light layer to compensate if the cans are already set.
- Mixed colour temperatures across fixtures. A 2700K pendant next to 4000K recessed cans looks unfinished no matter how expensive the fixtures were. Fix: replace bulbs or retrofit trim kits to match one CCT throughout.
- No under-cabinet task lighting at all. Ambient light alone leaves counters dimmer than the rest of the room, exactly where you need the most light. Fix: retrofit a plug-in LED strip kit; it’s one of the cheapest upgrades in the whole plan.
- A single switch for the entire kitchen. No dimming zones means no flexibility between cooking and hosting. Fix: swap in a smart dimmer module at the switch, no new wiring required in most cases.
- Too few circuits for the number of fixtures planned. This shows up mid-renovation when the electrical panel can’t support what the lighting plan calls for. Fix: this one needs an electrician early, before fixtures are ordered, not after.
On-site checklist to walk through with your contractor or electrician:
- Confirm ceiling depth and joist locations before ordering recessed housings
- Verify every fixture shares the same colour temperature spec
- Confirm under-cabinet strips are on the order, not an afterthought
- Confirm each layer (ambient/task/accent) has its own switch or dimmer
- Confirm circuit capacity matches total fixture count before rough-in
How much should you budget for kitchen lighting?
Lighting rarely gets its own line item in a renovation budget, which is exactly why it’s so often underfunded. It usually gets folded into “electrical” and treated as an afterthought behind cabinets and countertops. That’s backwards, because lighting is one of the cheapest ways to change how a finished kitchen actually feels to use.
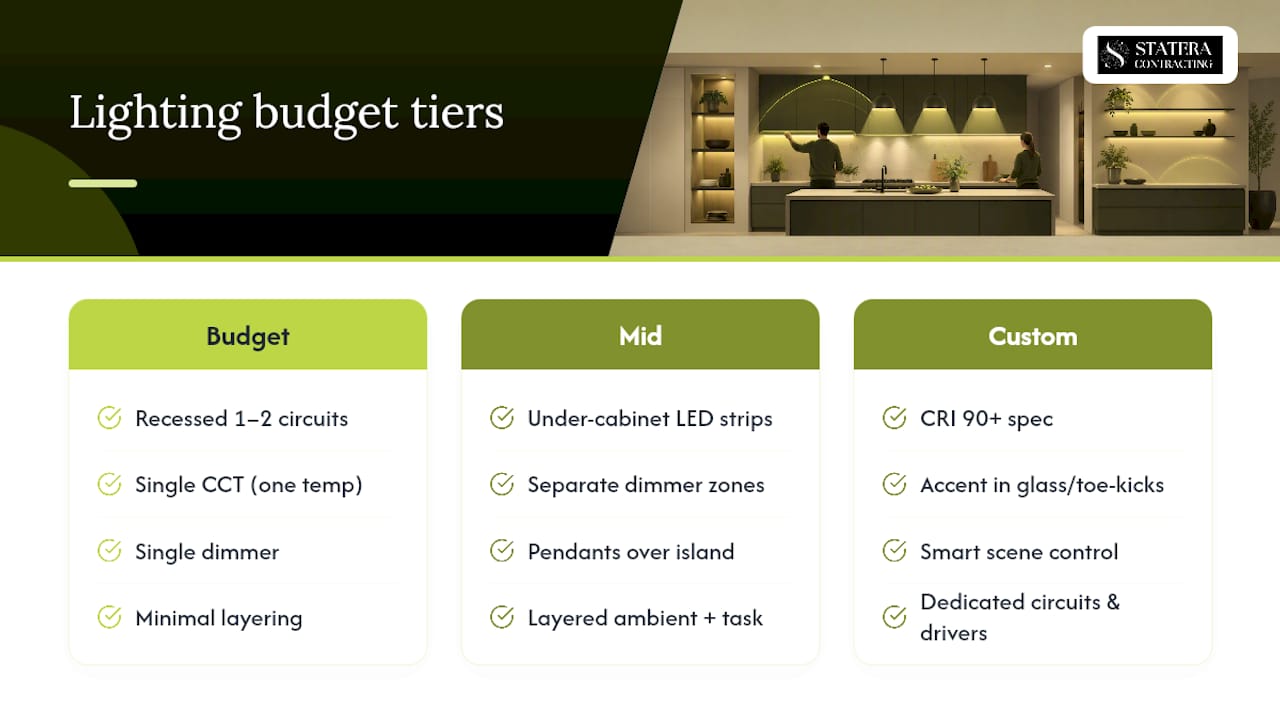
At the budget tier, expect standard recessed downlights on one or two circuits, a single colour temperature, and maybe one dimmer for the whole room. It works, but it skips the layering that makes a kitchen feel finished. At the mid tier, you’re adding under-cabinet LED strips, separate dimmer zones for ambient and task, and pendant lighting over the island, generally the point where a kitchen starts to feel deliberately lit rather than just illuminated. At the custom tier, expect CRI 90+ specification across every fixture, layered accent lighting in glass cabinets or toe-kicks, and smart scene control, alongside dedicated circuits planned around the full lighting design rather than retrofitted to it. Contractor project data shows lighting line items scaling clearly across these tiers, with the biggest jump coming from adding dedicated circuits and driver infrastructure rather than the fixtures themselves.
If you’re working with a tighter budget, prioritise in this order: under-cabinet LED strips first, since they’re inexpensive and consistently rated as the highest-return upgrade in a kitchen; dimmers second, because they cost little and add flexibility to every other fixture already in place; correct recessed layout third; and CRI upgrades last, since they matter most once the rest of the system is already in place. For a full breakdown of what fits into different renovation budgets, our budget kitchen renovation guide walks through the numbers by category.
One rule that doesn’t bend regardless of budget: new circuits, driver placement, and anything touching your electrical panel needs a licensed electrician, both for safety and because most jurisdictions require it for code compliance.
How does a contractor turn a lighting plan into a finished kitchen?
A proper lighting plan isn’t a mood board, it’s a document your electrician can build from without asking you twenty questions mid-install. On a kitchen renovation, that plan comes out of a site visit before anything gets ordered.
The workflow runs in a fixed order: a site check to confirm ceiling depth, joist spacing, and existing wiring; a zoning pass to map which fixtures land on which switch or dimmer; driver and transformer placement, decided before rough-in so nothing ends up sealed behind drywall; fixture specification with colour temperature and CRI locked in across the whole kitchen; and a final aiming and scene setup once fixtures are live.
What you should walk away with:
- A plan drawing showing every fixture location
- A lumen summary confirming the room hits its brightness target
- A switch map showing which fixtures are on which switch or dimmer
- Dimmer labels for the electrical panel
- Notes on driver access points for future maintenance
Pro Tip: Ask for the lumen summary in writing before fixtures are ordered. It’s the one document that lets you catch a lighting plan that’s short on task light before it’s too late to fix cheaply.
For more on how planning fits into the broader renovation timeline, our kitchen renovation planning guide covers the sequence from permits through to final walkthrough.
How do you balance natural light with your artificial lighting plan?
Design your kitchen lighting as if the sun isn’t going to help you, then let daylight be a bonus rather than a dependency. Professional guidance recommends planning the full three-layer system as though there’s no daylight at all, because relying on windows leaves you with a kitchen that only works well for a few hours a day.
That doesn’t mean ignoring your windows. A north-facing kitchen with limited direct sun needs its ambient layer sized closer to the top of the 70 to 100 lumens per square foot range, since there’s less natural fill to lean on. A kitchen with a large south-facing window can sometimes trim ambient fixture count slightly during daylight hours, but the task and accent layers still need full sizing, because direct sun rarely lines up with exactly where you’re chopping vegetables at 5 p.m. in January.
Dimmers solve most of the daylight mismatch on their own. A kitchen wired with separate ambient and task zones lets you drop ambient output on a bright afternoon and bring it back up at dusk, without touching the task lighting over your counters at all. If your kitchen has a skylight or a large window wall, consider adding a photocell or simple daylight sensor to your ambient circuit, so the lights fade in gradually as the sun goes down instead of snapping on at full brightness the moment dusk hits.
Which fixture types actually work well in a kitchen?
Not every fixture style suits every layer, and picking the wrong one for the job is a common source of disappointment after installation.
Recessed downlights remain the default for ambient lighting because they disappear into the ceiling and don’t compete visually with cabinetry or a pendant over the island. They’re a poor choice as a stand-alone solution, though, since they can’t be aimed low enough to eliminate task shadows on their own.
Pendants do double duty as task light and personality. Over an island, a well-chosen pendant adds both function and visual character to the room, which is why so many kitchen photos centre on island pendants rather than the ceiling grid around them. Choose glass or open-bottom shades if you want more light spread, and solid shades if you want a more directional pool of light on the counter below.
LED strips are the workhorse of the task layer. Continuous strips beat individual puck lights for under-cabinet use because they eliminate the dark gaps between fixtures, and a diffuser channel keeps the light even rather than dotted. Strips also show up in toe-kicks and glass cabinet interiors as accent lighting, where their low profile matters more than their brightness.

Surface-mount fixtures fill the gap in kitchens with limited ceiling depth, where recessed housings simply won’t fit above the drywall. They’re less common in new builds but a practical fallback in older homes with shallow joist bays.
What makes a kitchen lighting plan energy efficient?
LED is the only technology worth specifying in a kitchen renovation today, and the reasoning goes beyond the electricity bill. Kitchen lights run more hours per day than almost any other fixture in the house, so efficiency and durability compound over the life of the fixture in a way that doesn’t show up in other rooms.
LEDs also run cooler than the incandescent and halogen bulbs they replaced, which matters directly in a kitchen where fixtures sit near a range, an oven, or a hardworking exhaust fan. Less heat output means less strain on driver components and a lower fire-risk profile near cooking surfaces.
Look for fixtures and bulbs carrying an ENERGY STAR rating, since that designation ties directly to verified efficiency and lifespan claims rather than marketing copy on a box. Dimmable LED fixtures paired with compatible dimmers add a second layer of savings, letting you run ambient light at 40% output during a quiet weeknight dinner instead of full brightness by default.
One detail worth checking before you buy strip lighting in bulk: confirm the driver’s rated wattage against your total strip length. Undersized drivers run hot and fail early, which defeats the efficiency gain you were trying to capture in the first place.
What safety factors matter for kitchen light fixtures?
Kitchens are one of the harshest environments in a home for electrical fixtures, and lighting choices need to reflect that. Grease, steam, and heat from cooking surfaces all shorten the life of a fixture that wasn’t built to handle them.
Fixtures installed near the range or sink should carry a moisture and heat resistance rating appropriate to that location, not the general-purpose fixture rated for a dry living room ceiling. Electrical systems and lighting equipment installed in Canadian homes need to meet applicable CSA standards, which cover both the fixture’s construction and how it’s wired into the system, and this is a genuine reason to have a licensed electrician handle installation rather than a DIY swap.
Driver placement is a safety issue as much as a maintenance one. A driver sealed inside a soffit above the range runs hotter than one in open air, and heat buildup shortens its life while making a failed unit far harder to access. Locate drivers behind an accessible panel, away from direct heat sources, and confirm your electrician has planned for that access before drywall goes up.
Durable, easy-to-clean fixtures matter for kitchens specifically because grease film accumulates on any surface near cooking, including light lenses and trim rings. A sealed trim on recessed fixtures near the range makes a real difference in how easy the fixture is to keep clean over the years, and it keeps grease out of the housing where it can eventually affect the LED module itself.
The tradeoffs nobody puts in the brochure
Task light comes first, always. I’ve watched homeowners fall for a striking pendant before they’ve settled on under-cabinet lighting, and it’s backwards. A gorgeous fixture over an island doesn’t help you at all when you’re squinting at a cutting board three feet away in your own shadow.
The real tension on most projects isn’t ambient versus task, it’s budget versus completeness. A homeowner with a fixed number will often cut the accent layer entirely to afford proper task lighting, and that’s the right call almost every time. Accent lighting is the layer you can add in year two. A missing task layer is the layer you notice every single night while making dinner.
Where I’d stop a homeowner from making a decision alone is anything touching circuits, dimmer compatibility, or driver placement. That’s not a DIY judgment call, it’s a licensed electrician’s call, and getting it wrong costs more to fix later than it would have cost to plan correctly the first time.
— Patrick
Ready to install your kitchen lighting plan?
A lighting plan on paper is only useful once someone wires it correctly, and that’s the part homeowners underestimate most. The lighting plan is built into every kitchen renovation, starting with a site survey and zoning process, so the electrical work and the cabinetry get planned together instead of one fighting the other mid-project.

When you bring a kitchen renovation project to a contractor, you get a plan drawing showing every fixture, a switch map for the electrical panel, dimmer zone labels, and installation coordinated directly with the licensed electrician on your project, no juggling separate trades yourself. It’s the difference between handing a contractor a Pinterest board and handing them a document they can actually build from.
If you’re ready to move from planning to installing, start with a look at our kitchen renovation services in Calgary and request a quote for your project.
Sources
- Kitchen Lighting: Complete Guide to Lumens & Fixtures | Multi Lighting
- Colour temperature complete guide | Artika
- Home lighting design guide pocket book | Natural Resources Canada / ENERGY STAR
- Kitchen Lighting Design Vancouver 2026: 3-Layer System | Reno Stars