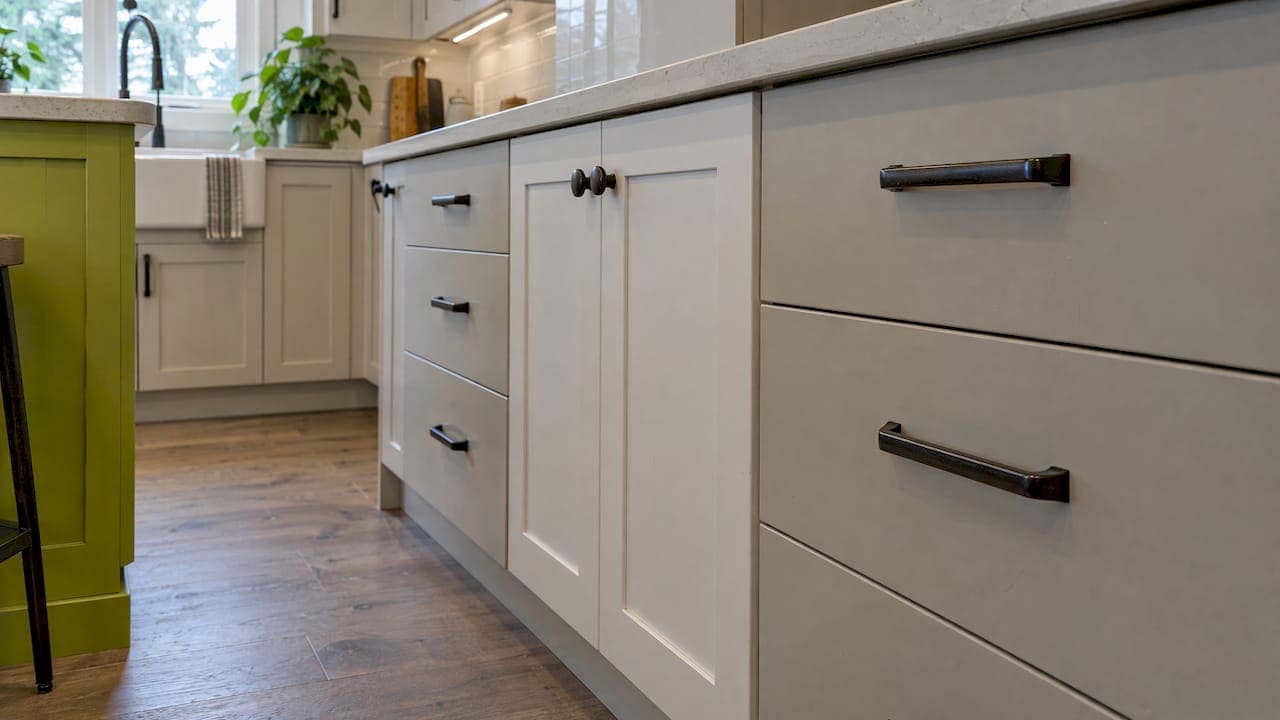
Put knobs and pulls on the edge of the door opposite the hinges. On upper cabinets they go near the bottom corner, and on base cabinets near the top corner. On drawers they sit centred. No building code sets these positions, so the real goal is consistency: every door and drawer in the kitchen follows the same rules. Below you’ll find the measurements we use, how to size pulls, how to handle awkward cases like tall pantries and narrow rails, and how under-cabinet lighting fits in.
Statera ContractingPlan a Consistent Kitchen UpdateStatera Contracting renovates kitchens in Calgary and nearby areas, bringing cabinet details into the wider picture of your home renovation.Explore renovation servicesTL;DR
- Hardware goes on the side opposite the hinge: near the bottom corner on wall cabinets, near the top corner on base cabinets.
- Drawers get hardware centred side to side. A pull about one-third of the drawer width is a reliable starting size.
- Most makers inset hardware roughly 2 to 3 inches from the door edges. Pick one measurement and repeat it everywhere.
- Drill a test hole in a scrap piece first, and use a template or jig for every door.
- Plan under-cabinet lighting at the same time as hardware. Mount fixtures toward the front of the cabinet bottom, and have hardwired lighting installed by a licensed electrician.
Table of Contents
- There is no code, only conventions
- Doors: which corner and how far in
- Drawers: centred, and sized by width
- Knobs, pulls, or a mix
- How to install hardware without ruining a door
- Under-cabinet lighting and hardware: plan them together
- Common mistakes we see
- Our perspective
- Planning a kitchen update in Calgary?
- FAQ
- Sources
There is no code, only conventions
People often ask what the “rule” is. There isn’t an official one. Cabinet makers agree on conventions and differ by about an inch, which means you have room to adjust for your door style, your hands and your kitchen’s look.
What matters more than the exact number is that the same number is used on every door. A pull that sits half an inch higher on one cabinet is noticeable, especially down a long run of lowers. We decide the measurements before any hole is drilled, write them on the plan, and apply them across the whole kitchen.
Doors: which corner and how far in
The placement logic follows how you reach for a door.
- Upper (wall) cabinets: hardware sits near the bottom corner, on the edge opposite the hinge. You are reaching up, so the handle falls where your hand arrives.
- Lower (base) cabinets: hardware sits near the top corner, on the edge opposite the hinge, so you don’t have to bend further than needed.
For the inset, VK Hardware, a Canadian hardware supplier, suggests 2 to 3 inches in from the edges. Another approach for flat slab doors is to keep the same distance from the edge on both sides of the corner, so the knob or pull looks deliberately placed rather than pushed into a corner.
Shaker and framed-style doors
Shaker doors have a flat centre panel and a frame around it. Hardware goes on the frame, not on the panel. The standard approach is to centre knobs on the frame piece (the stile) horizontally. A common guideline is to place holes about 2 to 4 inches from the top or bottom edge, which a door manufacturer’s placement guidelines also describe.
If the frame is narrow, measure carefully. A cabinet-door maker gives these starting figures for narrow-rail doors: 1.75 inches in from the edges for knobs, and 1.25 inches for pulls. The same source warns against fitting knobs or pulls on the narrow stile of Yuro butt doors: knobs can collide with each other, and pulls end up too close to the door edge to grip comfortably.

Slab doors
Flat slab doors have no frame to guide you, so the edge inset does the work. Stay in the 2 to 3 inch range, and keep it identical across the kitchen. Slab doors suit long, clean-lined pulls mounted vertically, and they are forgiving, because there is no frame line to clash with.
Tall pantry and linen cabinets
A corner position doesn’t suit a full-height door. Put the hardware at mid-height instead. VK Hardware gives roughly 36 to 44 inches from the floor for tall pantry or linen cabinets so that adults can reach it without stretching. If you have children or anyone with limited reach in the home, aim for the lower end of that range.
While you’re planning the position of tall cabinets, it helps to check how the doors swing. Our guide to kitchen countertop heights covers how the work surface height relates to where hands naturally land, and the same logic applies to handles.
Drawers: centred, and sized by width
On drawer fronts, the usual approach is to centre the hardware horizontally. Vertically, many installers use the exact middle of the drawer front, and some cabinet makers point to this as the way to spread the pulling force evenly. Others place hardware on the top rail of a five-piece drawer front or at the upper third of a deep drawer. Both can look right. What counts is that the same type of drawer gets the same placement.
Sizing a pull with the 1/3 rule
The 1/3 rule is simply this: a pull should be about one-third the width of the drawer or door. Lee Valley Tools recommends pull lengths of roughly a third of the cabinet or drawer width. Their examples:
| Drawer width | Suggested pull |
|---|---|
| 12 inches or less | 3 to 4 inch pull |
| About 24 inches | Roughly 8 inch pull (one-third) |
| 30 to 48 inches | Pull longer than 8 inches, or two pulls |
The middle row is our arithmetic from the one-third rule, not a figure from the source. Treat these as starting points. A heavy pots-and-pans drawer feels better with a longer pull that gives your whole hand a grip.
Wide drawers with two pulls
When a drawer is wider than about 24 inches, two pulls are an option. Divide the drawer front into three equal sections and centre one pull in each of the outer sections, as this installation guide describes. Two pulls spread the load so the drawer doesn’t twist as it opens.

Knobs, pulls, or a mix
Knobs are quick to install (one hole) and work well on doors. Pulls give a better grip on heavy drawers. Mixing the two is a common, accepted approach: knobs on doors, pulls on drawers, in the same finish. Deslaurier, a Canadian cabinetry brand, encourages homeowners to mix knobs and pulls to suit their own preferences.
A few other points on orientation:
- Traditional design puts pulls horizontally on drawers and vertically on doors.
- Modern kitchens sometimes turn the pull horizontal on a door. Deslaurier notes that this can feel awkward to use and may cause clearance problems when a door swings near a wall or an appliance.
- Check the swing of every door near a fridge, range or corner before you commit to a pull length. The same thinking applies to the whole room, and a practical look at efficient kitchen layouts shows how orientation and clearances affect daily use.
How to install hardware without ruining a door
The mistakes people regret are almost always measuring errors. This is the process we follow.
- Decide the measurements on paper. Write down the inset, the corner position, and the drawer rules before touching a drill.
- Use a template or jig. Marking each door by eye leads to drift. A jig makes every hole land in the same place.
- Test on scrap or the back of a spare door. Confirm the pull’s hole spacing matches the template. Hole spacing is measured centre to centre between the screws.
- Pick the right bit. A 3/16 inch drill bit clears the common 8-32 and M4 screws.
- Drill from the front with a backer board behind the door. This stops the wood from tearing out on the inside face.
- Check screw length. Doors and drawer fronts differ in thickness, and a screw that is too long pushes through the face. Doubled-up drawer fronts need longer screws than single doors.
- Install one door, step back, and look. Then repeat.
If you’re organizing the inside of the cabinets at the same time, measuring before you buy inserts is just as important as it is for hardware. This guide to bathroom cabinet organization with pullouts walks through that approach, and it applies to kitchen drawers too.
Under-cabinet lighting and hardware: plan them together
Lighting under wall cabinets changes how the kitchen looks and works, and the fixtures need to sit away from where hands and pulls reach. It’s worth deciding on both together.
Strip lights vs puck lights
| LED strip | Puck light | |
|---|---|---|
| Light spread | Even, continuous line along the counter | Pools of light with gaps between |
| Best for | Working kitchens and long counters | Display cabinets and small spots |
| Power options | Plug-in or hardwired | Battery, plug-in or hardwired |
A Canadian lighting supplier says battery pucks are fine for a display cabinet or pantry but not great for a working kitchen. Plug-in strips are the quick upgrade. Hardwired fixtures take more work and give the cleanest result, with no visible cords.
For placement, the same source says to mount fixtures toward the front lip of the cabinet bottom so the light doesn’t throw shadows from your hands onto the counter. On shiny stone or quartz, a cabinetry company recommends recessing the strip into the cabinet bottom and using a diffuser so individual LED dots don’t reflect off the surface.
For how under-cabinet light fits into the overall plan, see our kitchen lighting plan, which covers the three layers of light a kitchen needs.
Electrical rules in Canada
Plug-in lights are simple. Hardwired lighting is electrical work, and in Canada it falls under the Canadian Electrical Code (CSA C22.1). In Calgary that generally means an electrical permit and a licensed electrician, and the circuit capacity matters. Our guide to electrical load calculation in Calgary explains how that capacity is checked. Lighting equipment sold in Canada also has to meet radio-interference rules, set out in Innovation, Science and Economic Development Canada’s ICES-005 standard, so buy products from a reputable retailer rather than unbranded imports.
If the kitchen renovation needs permits, they’re best handled up front. Here’s what we do to prevent rejected kitchen permits in Calgary.
Common mistakes we see
- Hardware on the hinge side. The door has to swing against the hand pulling it.
- Pulls too short for wide drawers. A 3 inch pull on a 30 inch drawer looks lost and feels flimsy.
- Mixing insets. Two different distances from the edge within the same run of cabinets will show.
- Knobs on narrow stiles. If the frame is too narrow, a knob can hit the next door, and a pull can sit too close to the edge to grip.
- Forgetting the door swing. Hardware near an appliance can strike it. Check clearances first.
- Drilling before the cabinets are final. If you’re refacing or replacing doors, choose the hardware first, then fill old holes properly. Our overview of kitchen cabinet renovation options and budgets in Calgary explains when refacing, repainting or replacement makes sense.
Our perspective
Hardware is the part of a kitchen people touch hundreds of times a day, and it’s the part most often decided at the last minute. We prefer to settle it during design, before the cabinets are built.
When design is included with the build, as it is with our projects, hardware size, position and lighting are all on the plan before work starts. That’s what stops a pull from colliding with a fridge door, or a light fixture from sitting where a hand needs to be.
Our team is family-owned and manages each project directly. We talk with you daily, we check every measurement against the drawings, and we install with a template so each door matches the one beside it. That attention to small details is what a good renovation is made of.
Patrick
Planning a kitchen update in Calgary?
If you’re replacing cabinets or reworking the whole kitchen, hardware and lighting are easiest to get right when they’re part of the plan. We design and build kitchens in Calgary and nearby communities, handle permits, and keep you updated every day of the project.

See our kitchen renovation service or get in touch with Statera Contracting to book a consultation.
FAQ
What is the 1/3 rule for cabinet hardware?
It means a pull should be about one-third as long as the drawer or door is wide. For a 24 inch drawer, that’s roughly an 8 inch pull. It’s a starting point, not a hard rule, so choose a longer pull for heavy drawers.
Where should I put knobs on shaker cabinet doors?
Put them on the frame (the stile) on the edge opposite the hinge, centred across the width of that frame. On upper cabinets they go near the bottom corner, and on lowers near the top. Typical distances from the edge are 2 to 4 inches.
Should hardware be centred on drawers?
Yes, centre it horizontally. Most installers centre it vertically on the drawer front as well, though some use the top rail on deeper drawers. For drawers over about 24 inches wide, two pulls spaced in the outer thirds work well.
Can I install under-cabinet lighting myself?
Plug-in strips and battery pucks are straightforward to fit. Hardwired lighting is electrical work that falls under the Canadian Electrical Code and may need a permit and inspection, so use a licensed electrician.
Sources
- How to Install Cabinet Handles: Placement, Jig and Template
- How to Install Decorative Hardware on Cabinet Doors and Drawers
- How to Measure Hardware, Lee Valley Tools
- Where to Place Cabinet Knobs and Pulls, VK Hardware
- Cabinet Door Hardware Placement Guidelines
- How to Choose Cabinet Hardware, Deslaurier
- Horizontal vs. Vertical Kitchen Cabinet Handles, Deslaurier
- How to Install Under Cabinet Lighting
- Bright Ideas For Integrated Cabinet Lighting
- Interference-Causing Equipment Standards, ISED Canada
- Most Efficient Kitchen Layout: A Practical Guide
- One Day Bathroom Cabinet Organization